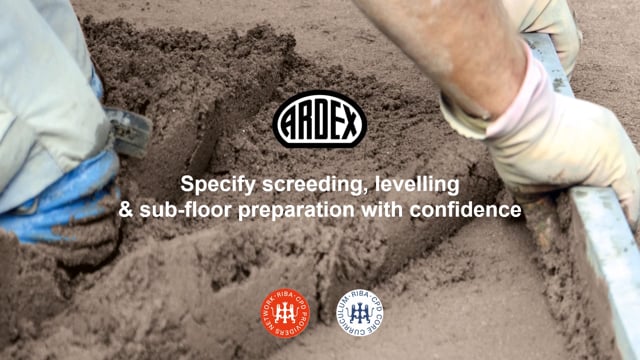
Specify Screeding, Levelling and Sub-floor Preparation with Confidence - ARDEX UK Ltd

Please contact us via contact@construction-cpd.com to get permission to publish this video on your website.
<div style="position: relative!important; width: 100%!important; min-height: 700px; overflow: hidden!important; padding-top: 56.25%!important;"><iframe src="https://www.construction-cpd.com/cpd-external-view?ExternalId=92&ReturnUrl=https://www.construction-cpd.com/sub-floor-preparation-screeding-levelling-cpd" style="position: absolute; top: 0; left: 0; bottom: 0; right: 0; width: 100%; height: 100%; min-height: 500px; border: none;" mozallowfullscreen webkitallowfullscreen allowfullscreen></iframe></div>
This CPD seminar aims to enable listeners to make informed choices when specifying screeding, levelling and subfloor preparation by considering the impact of the type, strength, soundness, flatness and moisture content of the subfloor, and how by achieving a perfect specification beneath, aspirations regarding the look of the final floor covering can be met.
It will also demonstrate how to avoid common installation failures through optimum product specification and guidance on best practice. Having followed this CPD, you should feel confident about selecting and specifying the appropriate preparation products in most situations.
Ardex UK Ltd History
Before commencing the CPD, we’d just like to set the scene regarding Ardex still a family owned business, Ardex has been at the forefront of the UK market for flooring and tiling products for 50 years. Servicing the market from its manufacturing base in Haverhill’s Suffolk. Being ISO 9000 one and 14001 accredited, you can rely on the fact that all Ardex products are manufactured to a recognised quality and environmental standards. We also take every appropriate step we can to minimise our impact on the environment. Our new products have been formulated to achieve greater coverage, so that less product is required during installation. And serious consideration is given to the sources of raw materials we use.
Login to record your CPD points

Ardex provides customers with quality products and a Technical Support network you can rely on. Our guiding principle is to have excellence in all that we do no matter how big all small the job.
We work closely with associations such as the contract flooring Association and Basa British adhesives and sealants Association to promote professionalism, technical standards and best practice within the flooring industry.
As documented in detail in BS 8203 BS82O4 BS5325 and 5385 particularly parts 3 and 5 but, all parts 1 to 5 are applicable, and code of practice 8000. The contract flooring Association is a source of useful information many major flooring manufacturers aim to provide sustainable products. Often using recycled products to produce vinyl floor coverings.
Specification support.
National Building Specification clauses provide best practice, guidance and support for your flooring specifications.
- M 10 is for cement based levelling wearing screeds,
- M 13 is for calcium sulphate based levelling screeds,
- M 20 is for plastered rendered and roughcast coatings, these can be found on the NBS plus system.
How to achieve the perfect finish. You may have experienced the disappointment of a poor flooring finish. Our vision is to ensure that a perfect finish is achieved every time.
Acheiving a Perfect Finish
A perfect finish required investment in preparation beneath. This is particularly important for resilient floor coverings such as vinyl, rubber and linoleum. Yet equally where any flooring material is installed such as vinyl, carpet and hard floor finishes like ceramic, porcelain and natural stone tiles successful performance of the floor is always closely related to the quality of the subfloor beneath. This can be achieved with the correct guidance and products, even when the project is pressed for time.
However, unfortunately, subfloor failure can constitute a major part of building failure, so the purpose of this seminar is to give guidance on how to achieve a robust subfloor specification, and avoid issues arising with the final floor finish, due to a misunderstanding of the subfloor requirements. Common failures such as shrinkage, bubbling and rippling are often seen and can be costly to remedy.
Key to a successful installation. Many issues can lead to disappointment if the floor finish is not as perfect as was aspired to, so as we continue through this CPD, we will highlight the key issues to be considered when specifying flooring.
Here will look at the key elements, starting with the concrete base slab. We’ll consider the importance of controlling moisture levels, service regularity, what criteria to consider when selecting your products and finally offer advice regarding best practice for the installation process.
Moisture considerations.
It is often not appreciated that even though a floor may have performed satisfactorily for many years, problems due to moisture can still occur when installing a new floor covering. Therefore, all installations require a damp proof membrane or DPM. There are damp proof membranes available which can even be applied to saturated surface dry concrete. It is vital that the installation has an effective damp proof membrane, ensure that one is situated either below the concrete slab, below the screed or below the smoothing compound. Moisture can be controlled by installing a damp proof membrane at one of the various points within the construction, as demonstrated here.
The way to ascertain whether or not a damp proof membrane is present on the floor is by undertaking a hygrometer test and, if it's not present whether or not it's adequate for the intended smoothing compounds and floor coverings.
If a damp proof membrane is present a further consideration is to ascertain whether the concrete or screed is dry i.e. with a relative humidity of 75% or less, when measured using a flooring hygrometer. Refer to BS 8203 for further guidance on dampness testing.
Base slab thickness considerations. Design consideration must take into account the required strength of the subfloor, necessary for the subsequently applied flooring material and anticipated loads, traffic and impacts.
Screed Design
Concrete base slabs are the most commonly found substrate the strengths of concrete base slabs are detailed in table of BS8204 part 1. Attention to the correct surface preparation of the concrete base slab is vitally important
In specifying the screed consideration must be given to the thickness of the screed and the preference for a bonded or unbonded construction. In some situations, choice may be restricted for reasons such as damp proof membrane requirements, or practical difficulties in achieving adhesion to the base slab or sub structure.
Ensure the service is flat, level and smooth and that it conforms to BS8204 part one for surface regularity. We cover this in more detail later in the CPD. The screed should be sound and resistant to crushing. This can be checked with the BRE screed tester. Check the moisture content to ensure that the screed is dry. The screed should also be stable and durable with no shrinkage.
Building up the base slab of flat and level base. There are three different types of conventional screeds: Bonded, Unbounded and Floating Screeds.
Which type you select will generally depend on the level you need to build up, as defined in BS 8204-1 the code of practice states the thickness is as presented on this slide.
- 25mm to 40mm for bonded,
- not less than 50mm for unbounded,
- not less than 75mm for commercial floating screeds
- not less than 65mm for domestic floating screeds.
However, one question frequently posed is how would you build up a screed, if you require a thickness between 40 and 50mm? According to the British standards building up above 40mm can increase the risk of loss of adhesion of the base. Therefore, in order to minimise this risk then it is always essential to adequately prepare the surface. Also rest assured that expertly formulated bonded screeds are available, which will build up from 15mm to 50mm.
Always apply screeds as a uniform thickness, any falls required should be formed in the base concrete. The different types of screeds are designed to perform at the thickness is outlined above, and this is a key consideration as for example, if you specify a bonded screed too thick then, there is a risk of it debonding. There can also be a risk of unbounded or floating screeds curling, where this is unacceptable, a concrete over slab should be specified at least 100mm thick and designed as a new floor.
What lies beneath.
Let's have a look at the build-up of that is what lies beneath the three types of screeds. In a nutshell bonded screed is built onto set hardened concrete base. Unbounded is applied to a concrete base over a damp proof membrane separating layers. And floating screed is used over compressible insulation materials for acoustic or thermal insulation. Next we look at the layers in more detail. Bonded, set hardened concrete base.
Unbonded, a damp proof membrane and separating layers where the base is unsuitable for bonded. Floating, a compressible layer commonly used with under floor heating insulation. All screeds must be thoroughly mixed at the right consistency by weight that's 1 part cement to 4 parts correctly graded screeding sand. They must also be well compacted.
Bonded screed traditionally minimum thickness of 25mm to a maximum about 40mm. Although, new rapid dry technology has made minimum 15mm and up to 50mm achievable. The concrete base must be prepared, and a bonding treatment applied to ensure adequate adhesion of cement and sand screed.
Unbounded screed, must have a minimum thickness of 50mm, applied to a concrete base over a slip separating or damp proof membrane, for example polyethylene sheet or where slab cannot be prepared. Note that a uniform screed thickness is preferable so concrete base should be reasonably flat with no step’s etcetera, that could lock the screed and cause cracking.
Floating screed must have a minimum thickness 75mm.
65mm for light loads applied of a compressible insulation materials for acoustic or thermal insulation.
Note that a uniform screed thickness is preferable. There is a product for every screeding situation available. A manufacturer who is an expert in fast track tiling can offer appropriate advice on product specifications and methods of work which will provide you with more options than the standard recommended drying times.
To ensure a successful installation, it's essential to check that sand is the right grade.
BS8204 part 1:2003 recommend sand conforming to BS EN 13139, it should meet the requirements of clause 5. 3.4 sand for cement sand levelling screeds, other sands may be used provided there are satisfactory data on the properties of similar levelling screeds made with them. The preferred grading for a thin bonded screed would be a 0 to 4 sand with a fine’s category 1 within the range MP and ideally have a grading between 20% and 66% passing the 0.5 sieve. For further discussion see Annex B.
Mixing best practice.
The correct mixing and application of the screed motor is essential to ensure that the design requirements are met. Here are a few tips to bear in mind. The mix should always be specified by weight, sand to cement 4 to 1. Damp sand can bulk up in volume by up to 25% compared with dry sand. When mixing by weight the maximum error is 5%. The specification should state that the sand cement screed should be mixed to a workable incompatible mix by a force action mixer.
Many mixing failures can be caused by the mix being too dry, the sand being too fine, the wrong type of mixer being used.
Surface preparation considerations.
Assuming that there is an adequate damp proof membrane the next area to consider is surface preparation. One of the most common causes of flooring failures relating to the subfloor is inadequate surface preparation. This is a particularly troublesome area, as the floor may initially appear satisfactory, with the problem not manifesting itself for many days’ weeks or even months after the floor has been laid.
Common contaminants.
Surface preparation is the foundation of the floor when applying bonded screeds and power floated concrete. It must be invested in to achieve the perfect finish we desire with no costly future failures. New screed services should have contaminants such as laitance, curing agents, plaster, paint, adhesive, oil, grease and debris, removed from the surface. In most cases of refurbishment work the existing floor finishes have to be removed and the subfloor renovated to a standard equivalent for a new subfloor. How to prepare the surface generally depends upon the contaminants to be removed.
Surface preparation using mechanised equipment is a specialist area in its own right, and to be effective the right type of equipment needs to be matched to the types of contamination being removed, depth to be removed, required surface profile, time available, etcetera. Here are examples of scabbling, shot blasting and edge grinding specialist equipment.
Fast track installations.
Where time allows a conventional ordinary Portland, cement based screed can be used. Making allowance for typically one day per millimetre of screed thickness for the screed to dry out with increasing times for thickness is exceeding 50mm. Nowadays especially in the retail sector, fast track working is increasingly common, due to the obvious reason of time savings. Rapid drying screeds incorporating special cements are dry enough to receive a floor covering within 24 hours. Irrespective of the screed thickness and thus offer considerable time savings.
Rapid dry for fast track installations. It is very important though to remember that rapid setting and rapid hardening products are not necessarily rapid drying, and this can be a critical consideration for fast track installations. Here we explain the difference in terminology. Normal or rapid setting, time taken to set, this characteristic determines the working time on site. Normal or rapid hardening, time taken to take loads, this characteristic determines the rate of strength development. Normal or rapid drying, time taken for screed to dry, this characteristic determines when the flooring can be installed.
Rapid drying and rapid hardening systems. Traditional sand cement screeds require a minimum of three weeks drying time prior to installation of floor coverings, and concrete floors require a minimum of 12 months. Uniquely formulated rapid dry products are available that reduced the drying time required to 4 hours. Background shrinkage and recommended drying times can cause practical timing problems on site. With this in mind a number of rapid drying and rapid hardening screeds and renders have been formulated.
Bonded screed.
Rapid hardening screeds will allow installation after three hours. Concrete base must have finished shrinking six weeks minimum.
Unbounded screed.
Rapid drying screeds will allow installation after 24 hours, even if the concrete base is still shrinking.
Floating screed.
Rapid drying screeds will allow installation after 24 hours, even if the concrete base is still shrinking. Note that some high performance screeds are only appropriate in dry locate.
Screed soundness a weak or poorly compacted screed may not provide enough restraint and or support for any subsequently applied underlayment topping when trafficked. It's advisable to always assess the soundness of the existing screed. If uncertain used the BRE in situ crushing resistance test as defined in BS8 204 part 1:2004. This test should also be defined for newly installed screeds, to ensure satisfactory long term performance. With some rapid drying systems new screeds can be tested six hours after application, whereas conventional Portland cement based screeds need to be left weeks to dry before tests can be carried out. Screeds can be tested on site and any unsigned screed can easily be replaced with penetrating screed repair systems.
Expertly formulated products will consistently achieve category A. Category A is for heavy foot traffic and heavyweight trolley areas, where a breakdown in the screed would be unacceptable, for example hospital operating theatres, X Ray rooms. Category B is for heavy foot traffic and medium weight trolley areas for example public areas, lobbies, classrooms. And category C is for light foot traffic and light trolleys, for example light office use.
BS8204 part 1:2004 in this graph X axis is how much the floor will be trafficked by people, trolleys, wheels, etcetera, and the Y axis is how thick the floor covering needs to be to cope with the load traffic. Within categories A B&C a large range of thicknesses can be safely specified, and the design characteristics achieved.
Smoothing and surface regularity.
With thin floor coverings for example vinyl sheet and tile, linoleum, floor paints, etcetera, the screed surface will require smoothing with an in situ applied underlay. Consideration should be given to the loads that would be sustained and the surface regularity required. The optimum performance of the floor finish will be achieved when it is well adhered to a smooth surface with a hardness close to that of the screed.
Check for surface regularity as specified in BS8204 part 1. Here table 8 shows the maximum permissible departure from the underside of a two metre straight edge resting in contact with the floor. For SR1- 3mm for SR2- 5mm and for SR3- 10mm. SR1 would show through shiny vinyl. SR2 could affect medium format tiles or laminate timber and SR3 could affect large format tiles. Surface regularity SR1 also check for surface regularity as specified in BS5385. Examples given here so that although all seemingly meet the SR1 criteria of 3mm tolerance the visual appearance of directly adhered thin flooring may not be acceptable. This demonstrates the necessity to use smoothing compounds on screeds and concrete.
Pumped applications.
The use of a continuous mixer pumping unit allows large areas of cementitious smoothing and levelling compounds to be completed quickly and easily and often with a superior finish. Pumping should be considered for any areas above about 800 square meters. It becomes increasingly cost effective for areas over 1000 square meters. Once pumping is completed the floor covering may be applied after 24 hours with some rapid drying systems. Fast track working requires particular planning and thought to allow sufficiently large areas to be made available for pumping, without contamination or damage occurring during or after the installation of the screed. Experienced and trained personnel should be used along with a reliable tested pump, and the correct tools and technique to install a satisfactory result. Beware of gaps or holes in the subfloor. Best to leave the pumping to the end of the contract. Carry out the surface preparation priming then pump the floor one day and install the floor covering the next, with a rapid dry system. Check water supply volume and pressure, if it's not guaranteed the user pumped water supply for the machine. Ensure electrical power supply during working hours. Use an experienced pumping contractor with appropriate materials and techniques and reliable equipment. With a pumped screed approximately 2000 square metres of material should be able to be applied per day. Typically, up to 500 square metres per hour can be achieved depending on equipment, preparation and experience. This has manual handling benefits as the weight of product required to achieve 1000 square meters at 6mm can be in the region of 7 to 10 tonnes. By developing 1 tonne bags any packaging wastage has been limited.
Smoothing compounds.
A range of smoothing compounds are available if thinner layers need to be made up from feather edge up to 50mm. These requirements are only achieved by the use of self-levelling underlayment’s that harden to give a compressive strength in excess of 20 newtons per square millimetre in thick layers. Products of this nature can be powder and water mixed or acrylic based latex and some have rapid drying and hardening properties.
Smoothing and levelling latex based.
In some circumstances the use of a latex based subfloor smoothing compound is necessary. Where their physical properties and adhesion to services such as timber, concrete adhesive residues, steel, bitumen or ceramic tiles, are appropriate these two powered systems do not generally need a primer to help adhesion or reduce pin holing. Also, the water supply on site may be an issue which two part systems overcome.
Smoothing and levelling water based.
Water based smoothing compounds are generally appropriate for timber, flooring grade asphalt, adhesive residues, cement, sand screeds, gypsum screeds, and concrete substrates. Powder and water based systems generally do require the substrate to be primed. Primers not only improve the bond but also reduce pin holing due to air rising from the underlying screed underlayment, and also enable the materials to achieve their maximum flow life by reducing the suction of the base. There are a wide range of primers and bonding dispersions available and it is important to follow the manufacturer’s directions with regard to dilution and application, as inappropriate use may cause problems.
Levelling a timber floor.
When levelling a timber floor, it's always advisable to use a high performance levelling compound, containing advanced technology fibre reinforcement.
To sum up ensure an effective damp proof membrane is installed. Screed thickness required i.e. bonded, unbounded or floating. Ensure suitable use of bonding slurry. What surface regularity is required? check with a straight edge. Is the preparation and mixing equipment adequate? Is the correct grade of sand specified? Is there temporary protection if the new screed is to be trafficked?
This CPD has provided you with training on the main watchpoints and considerations in specifying screeding and levelling prior to laying your desired floor covering. We've reviewed how issues such as moisture content and surface irregularity can affect the finished look of your floor. We've introduced you to new technologies such as rapid dry and microtek. Designed to aid your specification by bringing added performance characteristics and speed to the overall. Installation by following the best practice guidance contained within this CPD you will achieve a beautiful floor finish, that's designed to last for years to come. Further information may be available from the contract flooring Association and base British adhesives and sealants Association and technical standards and best practice within the flooring industry are documented in detail in BS8203, BS8204, BS5325 and BS5385 particularly parts 3 and 5 but all parts 1 to 5 are applicable along with code of practice 8000.
Thank you for your interest in this CPD.